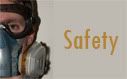
Wednesday, March 24, 2010

Airbrush Safety

Hey folks,


two weeks ago I had to paint about 1000 points of Warhammer 40k TAU miniatures in one week. I used my airbrush to get this huge amount of minis painted in such a small amount of time. Two problems emerged that week I want to share with you:


1. Never ever airbrush for several hours in your living room. As my TAU are blue the Enchanted Blue particles dispersed everywhere in my living room although I'm brushing with low pressure. Each square millimetre was covered with the airbrush fallout. It took me hours to clear the mess.

2. The second day I brushed in my basement without adequate ventilation protected only with a low cost particle mask used during the swine influenza. I returned to my flat after 2h and recognized that I had a disordered field of vision induced by the mixture of water, pure alcohol and paint. Thankfully the disorder disappeared after 30 minutes but I felt unhealthy the whole evening and the next day.

Whatever type of hard guy you are, please protect your health and wear an adequate breathing mask. Airbrush and coat only in good ventilated rooms. I recommend to use a mask also for prime coating.

I learned from this and bought a mask from 3M.

Read more...

Friday, March 19, 2010

Step-by-Step Hortak Black Crow

Ok guys,


here we have a miniature I finished about a year ago. Obviously my painting skills have increased in the meantime as you can see if you compare it to my finished Falkar. Nevertheless this step-by-step maybe very helpful.

This project was about Hortak Black Crow from Andrea Miniatures. As usual the proportions and pose of this Andrea miniature is outstanding! I spent about 100 h in total on him.

I made several mistakes tinkering and painting him and hope that this tutorial will prevent you to make the same mistakes.

You will find the rather old Cool Mini or Not link here.

Ok let's start with the result!


Step-by-step

The facts:

Manufacturer: Andrea Miniatures
Size: 54 mm
Used colours: Games Workshop, Andrea Miniatures
Time spent: approx. 100 h (3 months)
Socket: Wood from hardware store
Water: 2 component water from Ziterdes (Noch), polystyrene board
Tree: Wire-frame + (low cost) putty
Vegetation: random plants
Snow: baking soda and baking powder

Step 1:
I wanted to paint the skin of Hortak using the Skin Painting Set of Andrea Miniatures. This became a venture as I'm usually using minor pigmented colours (GW). To have the ultimate thrill I decided to shade and highlight the skin with my airbrush. First mistake: I diluted the colour with pure alcohol. The paint had some kind of reaction with the pure alcohol transforming the paint into sludge. The applied paint dried very crumbly. Nowadays I dilute the paint with a mixture of water and pure alcohol and no reaction occures at all. In my opinion the alcohol is mandatory to make acrylic paint better usable in an airbrush.


Step 2:
The skin was acceptable for me so I began to strip the paint from the rest of the miniature using nitro thinner. I started to prime the hair and did first tests with NMM on the blades.


Step 3:
Hortak was supposed to wear a leather tunic and red cloth to create a warm-cold contrast between the leather/cloth and the NMM. The leather was primed with a mixture of Tallarn Flesh and Snakebite Leather. The leather was shaded with tints of brown. Here I used Midnight Blue as darkest color. Keep in mind that black is often improper as darkest shade. In the end I washed the leather with ultra-diluted purple.


Step 4:
To increase the cold-warm contrast, the outlining metal applications on the leather were also painted in NMM.


Step 5:
Hortak was supposed to stand on a frozen lake on a self-made base. I knew that a good friend of mine tinkers wonderful trees from wire, so he helped me to make my own tree for the base.


Step 6:
The bark of the tree was assembled from some kind of low cost putty. I applied small roots at the ends of the wire frame to get a more realistic tree.


Step 7:
The inclined ground of the lake was made from cork and a mixture of cat litter and bird sand. Use some small plants to give the ground a more realistic look.


Step 8:
The ground was painted in several tints of brown and green. Nature is chaotic so you also have to be chaotic applying the colours. I surrounded the base with plastic card to add the 2-component water.
Always consider the following

1. Apply the plastic card perfectly horizontal as we will overfill the plastic card.
2. Use plastic card with a minimum thickness or it will bend resulting in bended water.
3. Apply some coating to the plastic card or it will react with the 2-component water making the water dull.


Step 9:
Heat the 2-component water from Ziterdes for 20 minutes in 50°C warm water. Don't skip this step as it will be much easier to mix the water after this step.


Always wear some protective gloves!


Mix the components slowly or you will have many bubbles which are hard to remove in the water. Carefully fill the mix into your plastic card container avoid further bubbles and remove all remaining bubbles with a needle. You have about 15 minutes to fill the water and remove all bubbles so don't panic.
Due to the shrinkage and the surface tension of the 2k gel you often see this ugly elevation of the water at the borders. Just add enough water at the beginning so that you "overfill" the frame up to the maximum surface tension holding the water in place. Due to the shrinkage the water it will be flat at the end.

The Ziterdes water doesn't grow warm as typical 2k gel. Therefore you are not forced to apply the 2k water in layers which is a huge advantage in my opinion that justifies the price of the Ziterdes water.


Step 10:
The water became dull after 20 h curing due to some reaction of the plastic card and the resin.


Also my cat Dr. Jones thought that I buggered it up.


As always: Don't panic!

Sand the water with some sanding paper und seal it with hairspray or another gloss varnish. The water will be transparent after this step.


Step 11:
I added the polystyrene board to represent the frozen top of the lake. Due to inadequate thickness of my plastic card the water was bended :-(.


Step 12:
I painted the tree, added some snow using baking soda and baking powder (better use my other snow method) and glued everything on the base.


I hope that this step-by-step and especially my mistakes are helpful to the community!
Read more...

Thursday, March 4, 2010

Falkar finished

Heureka,


last friday I managed to finish Falkar Wandering Sword from Andrea Miniatures. Having received several comments in the last days I would like to drop some words about Falkar.


Let's start with the facts:

Name: Falkar Wandering Sword
Manufacturer: Andrea Miniatures http://www.andrea-miniatures.com/
Material: all-tin
Parts: multipart model - torso, legs, (weird) base, arms, shield, cape, spear and crossbow
Size: 54 mm

Falkar is really massive and very heavy. The miniature is very well sculpted and perfectly casted. The dynamic pose and many details make him quite outstanding.

Nevertheless it often was a pain to paint him. You get tired due to the weight of the model very fast. Especially if you want to turn the model around if it comes to wet-in-wet blending. I learned the wet-in-wet technique at Goatmans workshop. Goatman turns the miniature and the brush faster than Lucky Luke.

I wanted to paint Falkar in a rather natural look. Therefore I mainly used desaturated colors. Adding a drop of grey or some washed with brown often does this job.

You will find a tutorial about my snow here and a tutorial about the self-made gras here.

The tree trunk is from a dried small bush. The tartan and the small armour plates are free-hand.

As usual you can vote for him at Cool Mini or Not.

Retrospectively the NMM of the crossbow and the sword are too clean and look more like comic style.

What I learned most painting this model is that it is all about global lightning and symphony. Often you lose yourself in details and concentrate on maximizing the dynamic range of a single blending. The conflict between focus and symphony (further reading: A Whole New Mind: Why Right-Brainers Will Rule the Future).

In my opinion two further masters (beside Goatman) regarding symphony are Ben Komets and Jarhead (Roman). I learned at their workshops that it is not about technique (although technique is important) but about symphony.

Focus to learn from your mistakes but create a symphony when you are painting.

Now here is my "symphony" - not as good as Ben and neither as Jarhead but does that matter - no because it's better than the Old Grumbler ;).

Read more...

Wednesday, March 3, 2010

Grass from sisal

Heyho,


today I want to present a small tip to make realistic looking grass. There is nothing wrong if you use professional products like grass from MiniNatur or others but self-made grass is just cooler :).

Here we go...

...get a string of sisal or hemp

and use some sort of brush to bring the string into form. I used a steel brush

Cut the sisal to a usable length. My pieces were about 5 cm long. Keep in mind that they should be longer than needed. You will be the hair stylist that cuts them to the needed length after you applied them to the base.

Use some cheap acrylic paints mainly in brown and green hues to paint the sisal.


I dried the grass inside my microwave oven. The grass becomes a little bit more rigid than the initial sisal. Which is great in my opinion because you can bend the grass in the needed direction (wind direction for example).


I added an image of my grass and the professional grass produced by MiniNatur for comparison.


Here you can see some tests


and the final application on the base of Falkar.


Grumbler
Read more...

Labels

  © Blogger templates 'Neuronic' by Ourblogtemplates.com 2008

Back to TOP